


Introduction
Some say ReactJS is a JavaScript framework, others call it a library, including me in the first episode, and the rest hold the idea of it not being a full-fledged framework (maybe something in between a framework and a library). This argument of React being a library or a framework is due to the popular comparison of React and other JavaScript frameworks by many technical writers. And that, to me, is a disrespect!
Another popular argument about the JS framework thingy is the best between ReactJS and any other JavaScript framework, mainly VueJS. My opinion here is, it is not my business, and my advice to you is not to allow it to be yours either, at least for now. Rather, focus on learning React's basics and getting them right for your next project.
This article explains the process of setting up a ReactJS environment on your machine, listing the prerequisites for React and their installation procedure.
Setting up React
Setting up React is easy and at the same time, can be tricky, especially when your OS is different or the version of some of the prerequisites, which I'll name soon, is not up to date.
Let's start with the prerequisites first.
Prerequisites
My first piece of advice: If you're not really new to React, or maybe you're not entirely a newbie, and you've entered some
create-react-appcommands on your computer terminal and it did go successful as expected, update node and npm on your system before you continue.
Node
Node is a JavaScript runtime machine for interpreting JavaScript codes on your local machine without assistance from the browser. Just like the V8 engine is to Chrome and Spyder is to Firefox, Node is to your local machine. Node enables JS developers to build full-stack applications. Since React is built on JavaScript and will need to be interpreted, Node is a basic requirement for you. To install Node, go to nodejs.org, choose the latest Node version that matches your OS, and install.
NPM
NPM is a package manager for managing modules and software installations for your programs. It helps install packages for your applications and manage their dependencies.
Yarn
In case you've worked with Node before and you did not like its architecture, I present before you today, YARN. Yarn is a package manager, just like Node, but with better operability and speed. It may be substituted for Node in working with React and it works just fine. However, whenever you start with Yarn, you stick with it to the end. Not just in React, but also in any program or software you are developing.
That's all for now. Nothing else is really important. That said, let's move to the installation process.
Creating React App
You may be wondering that I mentioned 'installation' in the transition sentence, and I'm heading this section with 'Creating', do they really go together?
Yes, they do. 'Installing React' and 'Creating React App' is basically the same sentence with different words. Now that you understand that, let's proceed to the steps.
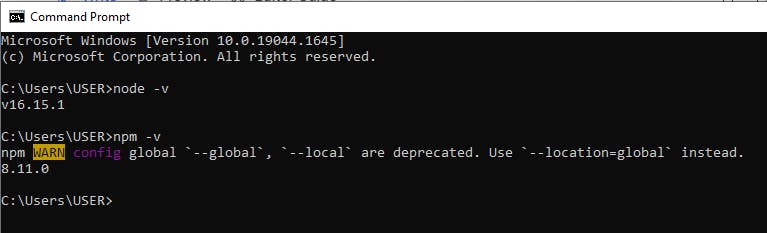
- Step 1: Check node and npm version
With NPM and Node installed on your machine, run npm -v and node -v on your terminal (Command Prompt for windows and Bash for MacBook) to compare the version of Node and NPM on your machine with the latest release.
 No difference you say? Okay, do this next.
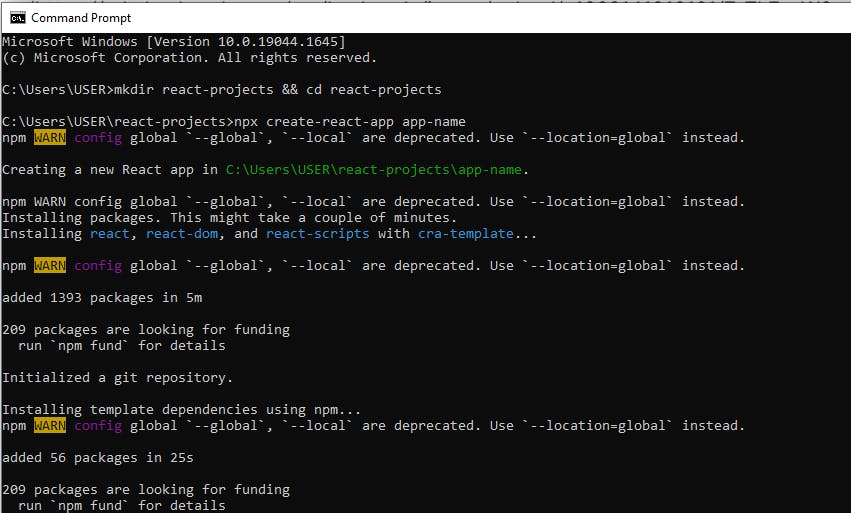
- Step 2: Create a directory for your app
Create the directory where you want your React app to be installed (for me, it will be react-projects), and cd into it:
mkdir react-projects && cd react-projects
This command will create a new directory for you, named react-projects and move you into the directory.
- Step 3: Create React App
Enter the create-react-app command on your terminal.
npx create-react-app app-name
This command will begin the installation process of React on your machine. Depending on your internet speed and RAM, the installation may take from 1 to 5 minutes.
 When you get the message, Happy Hacking!, your React App has been successfully installed!
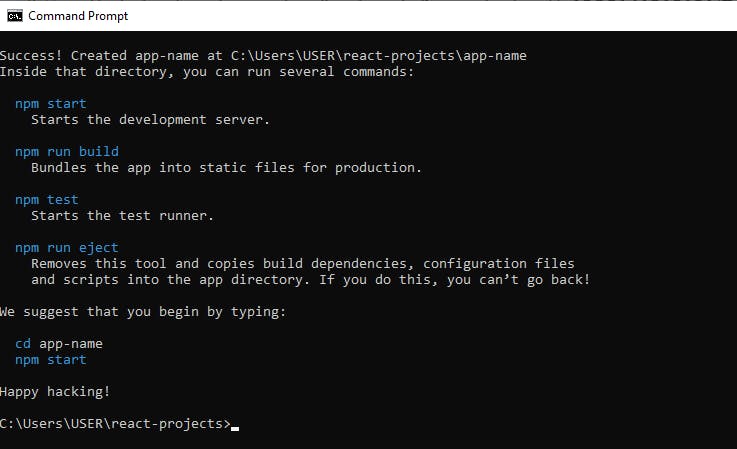
- Step 4: Start your app
cd into app-name and enter npm start to start your App.
cd app-name && npm start
That's it! Congratulations!
What Happens Next?
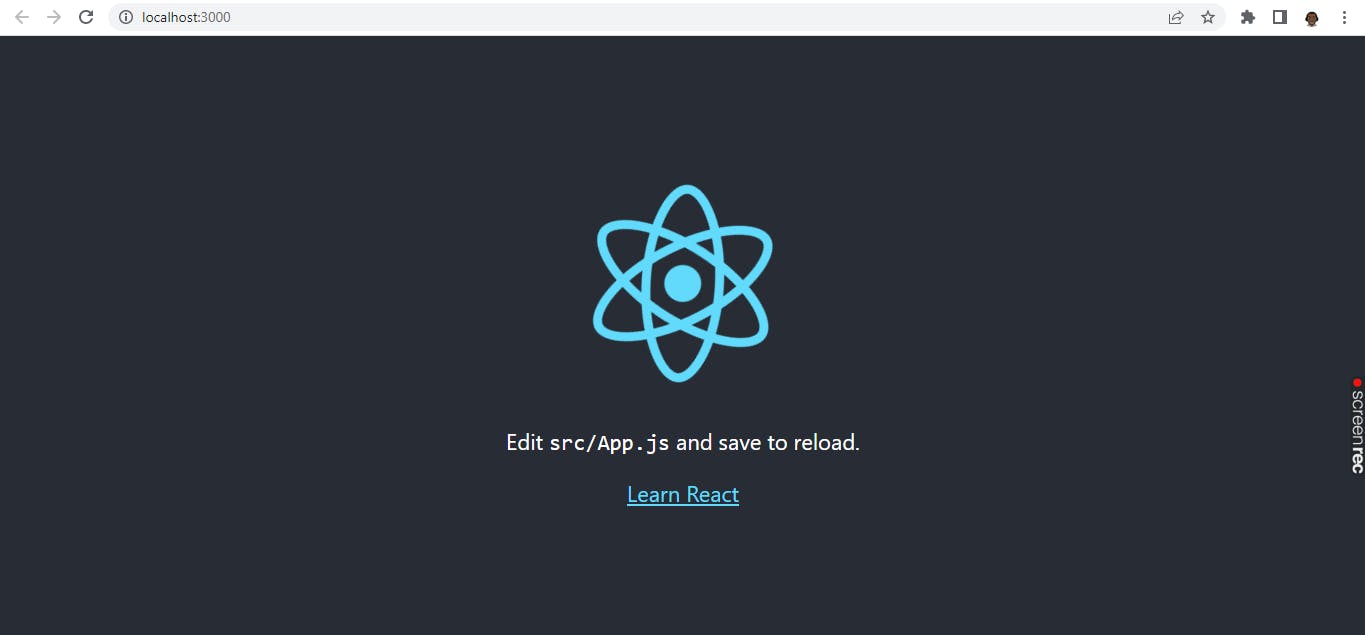
React compiles your app using Webpack and uses the server 3000 on localhost to display your App on your default browser.
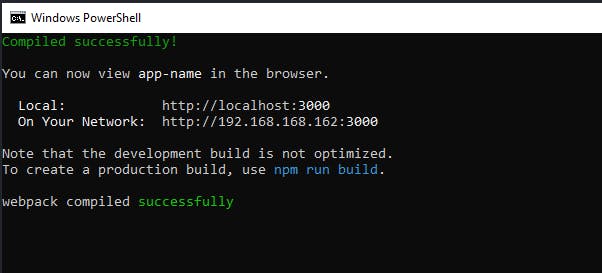 You can now view your App on localhost:3000!
 Oh! You saw Webpack and I did not mention it in the prerequisites section! Yeah, it's intentional. Some articles mention Webpack and Babel as prerequisites for installing React. That's true, but only for earlier versions of React. With the latest versions of React, all React-required dependencies are pre-installed together with your React app, so, you don't need to worry about them anymore.
And, as for React dependencies, that's a story for the next episode. Don't forget to subscribe to my newsletter and receive my latest release directly in your mail. That's a more personal thingy.
Connect with me on Twitter @Tech Evangelist, and tell me how much you love this episode, and also what I need to improve on. I really want to hear them.
As usual, See ya'! Catch ya'!